Heena Modi
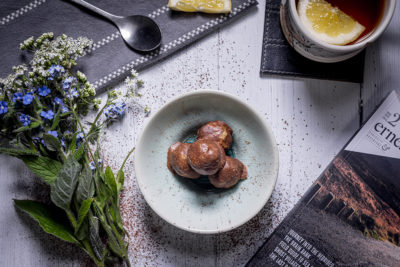
I’ve made these treats a few times now. They’re easy to make, it doesn’t take long, and they’re simply delicious!
This recipe makes about 16 Truffles – this will vary according to the size of the Truffles made.
I’ve made these treats a few times now. They’re easy to make, it doesn’t take long, and they’re simply delicious!
This recipe makes about 16 Truffles – this will vary according to the size of the Truffles made.
Serving: Serve the truffles straight from the freezer, but if they’ve been in the freezer for a day or longer, take out the number that you are going eat and allow them to soften for about 10 – 15 minutes, before biting into them.
Storage: They can be stored in the freezer for at least 2 weeks.
Optional: Sprinkle a small amount of sea salt on the truffles before freezing them for the final time
Variations: The next time I made these I put them in disposable cupcake cases, which was easier and neater. I’ve now purchased reusable cupcake cases to do this in the future.
Join in to receive a celebrity e-cookbook along with 31 days of inspiring recipes, nutrition tips and more. All our resources are 100% free!